
Create the Claim
Enter the property address and reported date of loss.
That is the entire setup. From the address and the reported date of loss, ClaimProof begins researching the property and the storm event before you have uploaded a single document.
Verify Weather
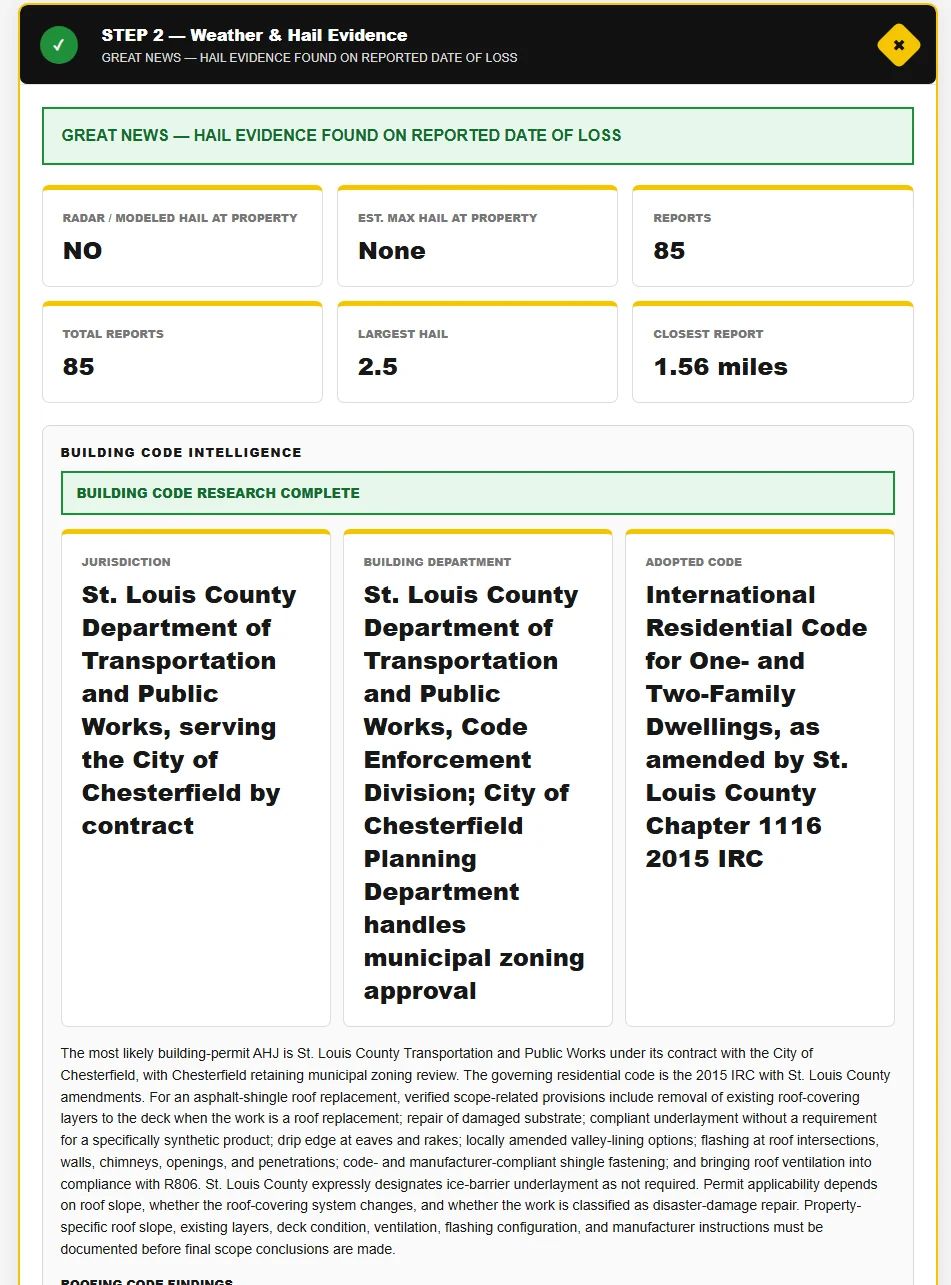
ClaimProof researches weather and hail evidence associated with the property and reported loss date.
The system looks for hail reports, hail size, distance from the property, the number of nearby hail observations, geographic proximity, severe-weather activity, modeled hail information when available and storm-report activity. When supporting hail evidence is identified on the reported date of loss, ClaimProof clearly identifies it for you.
Search Historical Storms
ClaimProof searches the previous 12 months for other significant hail events.
ClaimProof does not stop at the date entered by the user. It can evaluate potential alternative storm dates using reported hail size, number of reports, distance to the property, severe-weather probability, modeled severity and recency — providing historical context without automatically changing the homeowner’s reported date of loss.
Research Building Codes & Permits
ClaimProof researches the jurisdiction, adopted code, amendments, permits and inspections.
ClaimProof attempts to determine the municipality, county, Authority Having Jurisdiction, building department, adopted building or residential code, code edition, local amendments and roofing-specific requirements — distinguishing verified, source-backed requirements from items that require additional professional verification.
Upload the Evidence
Estimates, measurements, inspection reports, photographs and correspondence.
Upload insurance estimates, contractor estimates, EagleView measurements, inspection reports, CompanyCam reports, photographs, correspondence and supporting documents. ClaimProof handles the claim as a set, not as isolated files.
Analyze Every Document
ClaimProof reads and organizes the claim documents.
The system extracts important facts, measurements, financial information, scope and pricing metadata, then organizes what it finds into one comprehensive claim record.
Compare the Entire Claim
Documents, measurements, weather, photographs, codes, permits, taxes, pricing and scope — together.
This is the step that separates ClaimProof from document summarizing. Every source is analyzed against every other source so the system can identify where the evidence agrees and where it does not.
Review the Findings
You review differences, evidence, omissions, conflicts and verification items.
ClaimProof presents identified differences, supporting evidence, possible omissions, document conflicts and items requiring professional verification. Before generating the report you can also give ClaimProof additional instructions — for example, “focus on the flashing discrepancy” or “make sure the outdated price book is discussed.”
Generate the ClaimProof Report
A professional PDF evidence package.
ClaimProof assembles the executive summary, claim facts, key findings, comparisons, code and permit findings, weather findings, the hail proximity map, curated photographic evidence, limitations and the original inspection documentation into one professional PDF.
Send It
ClaimProof prepares the email to go with the report.
ClaimProof automatically prepares an email subject and a professional email summary describing what is attached and highlighting important findings from the report. Copy it directly out of ClaimProof and send.
User-directed final review
You can tell ClaimProof what to focus on.
Before generating the final report, you can give ClaimProof additional instructions. It incorporates them into the final review.
- “Double-check this issue.”
- “Focus on the flashing discrepancy.”
- “Review the measurements again.”
- “Make sure the permit requirement is included.”
- “Focus on the carrier’s estimate.”
- “Make sure the outdated price book is discussed.”
In the product
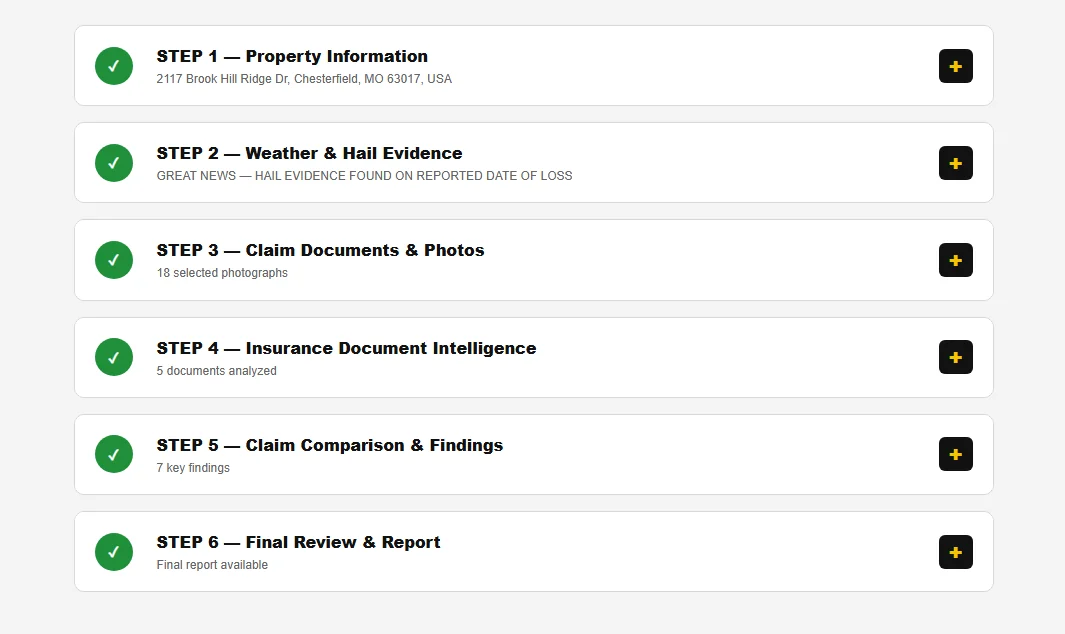
What the workflow actually looks like.
Every step reports what it found, so you always know where a roofing claim stands.
A closer look
Inside two of the steps.
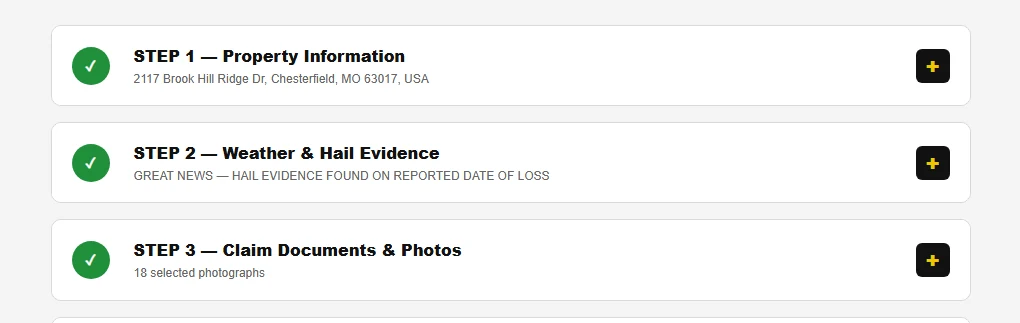
Every step reports back.
No step finishes quietly. Each one states what it found, so a claim never sits in an unknown state.
- Hail evidence confirmed against the reported date of loss
- 18 photographs selected from the inspection record
- 5 insurance documents analyzed
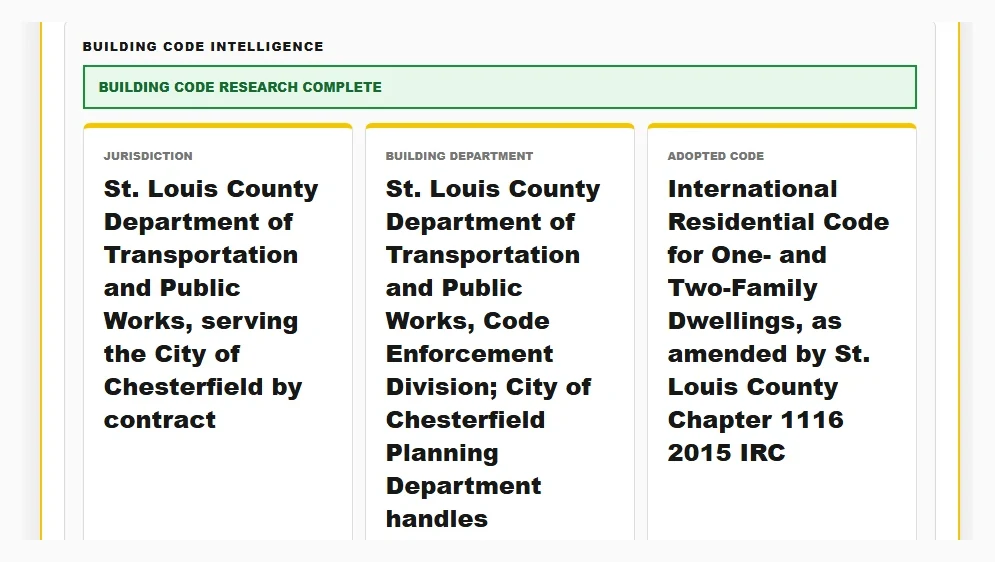
Then it researches the jurisdiction.
Before scope is compared, ClaimProof identifies who governs the property and which code edition applies.
- Permit authority and building department identified
- Adopted residential code with local amendments
- Roofing provisions pulled for the scope comparison
Turn your next claim into evidence.
Book a walkthrough, or request access and start processing claims.